DiapStash - Real life status of your favorite app in your streams
Learn how to download, install, and configure DiapStash - Stream Automation Hub, a plugin for JakeyTTS that automates status updates and overlays.

- abdldavid
- 6 min read
Hello everyone!
Today, I am super excited to introduce and walk you through DiapStash - Stream Automation Hub, a powerful plugin for JakeyTTS. This plugin allows you to connect your DiapStash account to your stream, showcase your diaper status, trigger overlays, and link them directly to your Twitch commands and channel point redeems.
Let’s dive into how to download, install, and configure this plugin so you can get it up and running on your stream!
[!WARNING] You might find some bugs here and there since this is the first public release and i have limited time and limited dexterity. Please report them to me on Discord or GitHub.
1. Download & Initial Setup
The plugin is distributed as a lightweight Windows application.
[!TIP] Download the latest version of the plugin here:
Download DiapStash v2.0 (.exe)
After downloading and launching the application, you’ll see the main dashboard indicating that API credentials are missing.
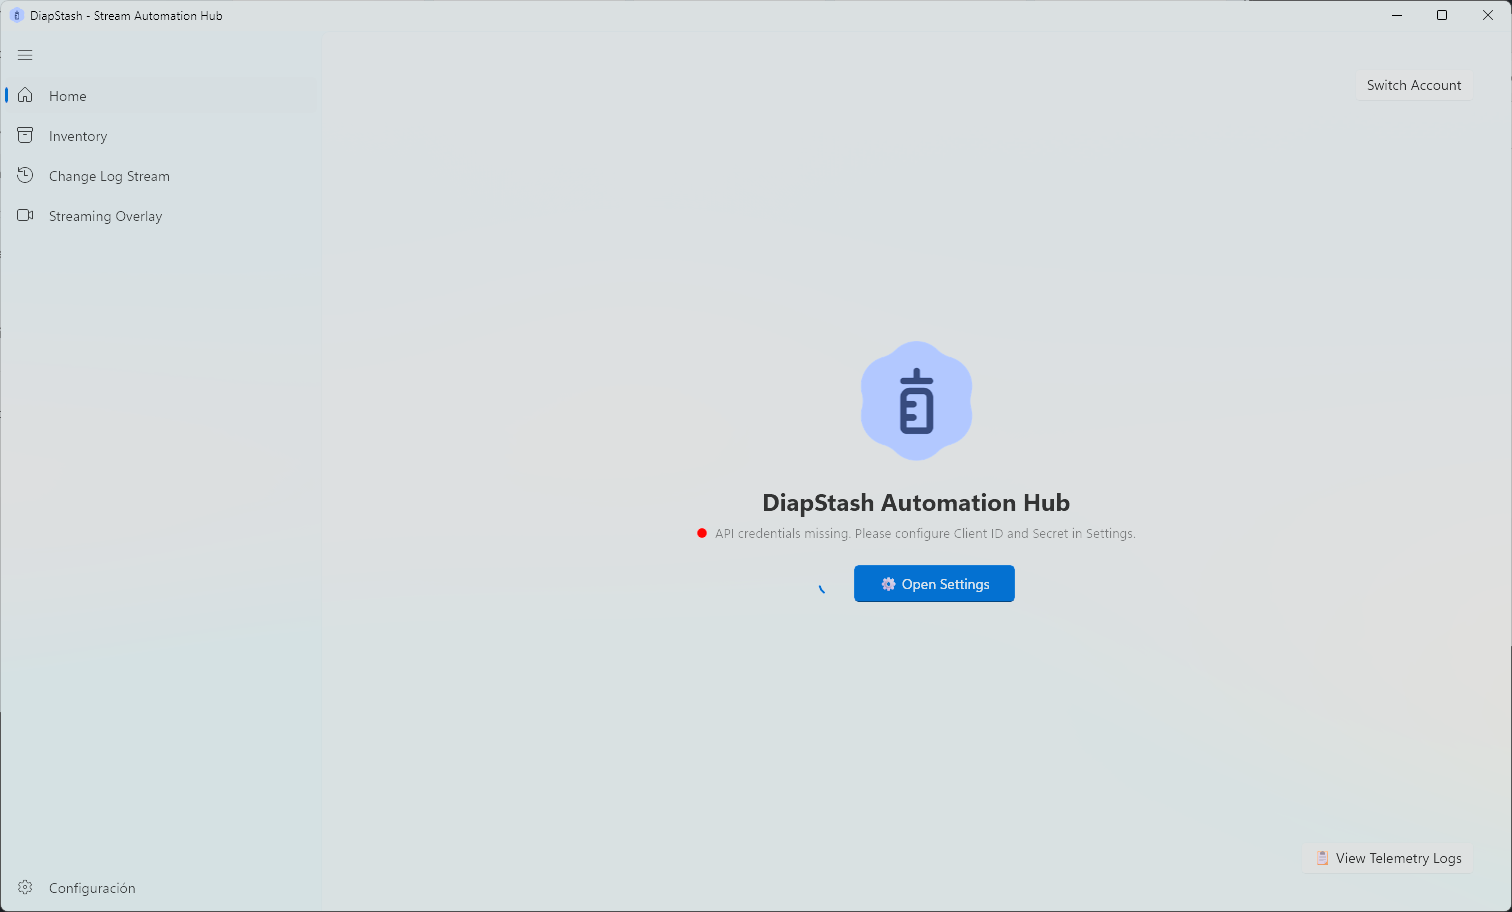 (Initial home screen showing that credentials need to be configured.)
To begin configuration:
- Click the Open Settings button in the center (or navigate to Configuración in the bottom-left corner).
- The Application Settings page will load.
- Click the blue Launch Interactive Setup Wizard button at the bottom of the page to start the link process.
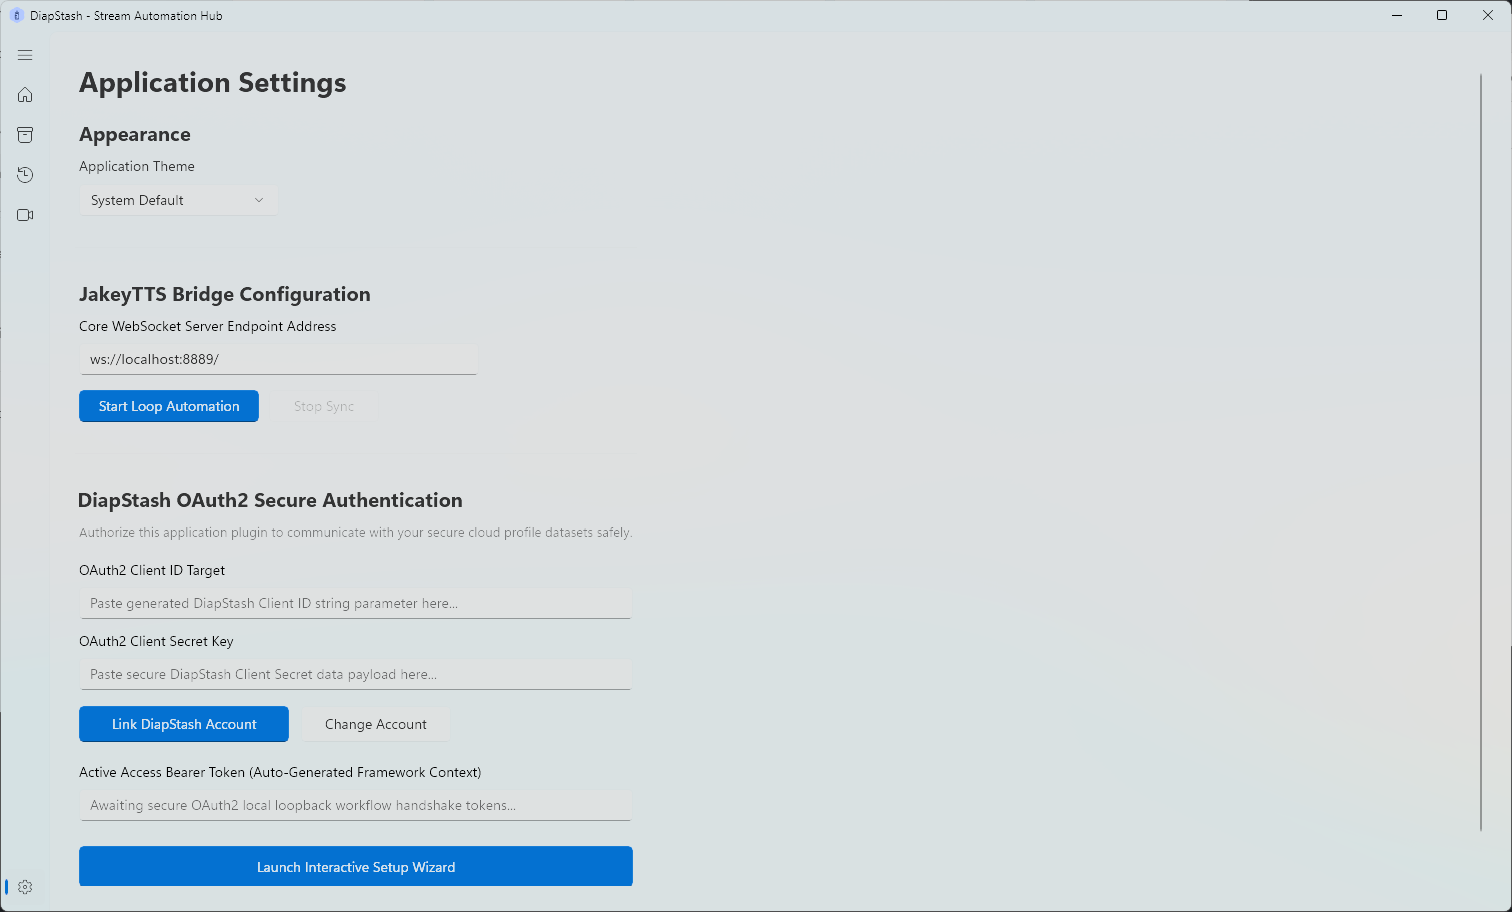 (The Application Settings screen where you configure the WebSocket bridge and launch the setup wizard.)
2. Interactive Setup Wizard Walkthrough
The Setup Wizard will guide you through the process of linking your DiapStash cloud account with your local application bridge.
Step 1: Open Developer Panel Portal
Click on the provided link inside the wizard: Click here to request API access links (Portal). This will open your web browser and take you to your developer panel. Once the page loads, click on the Create API client button.
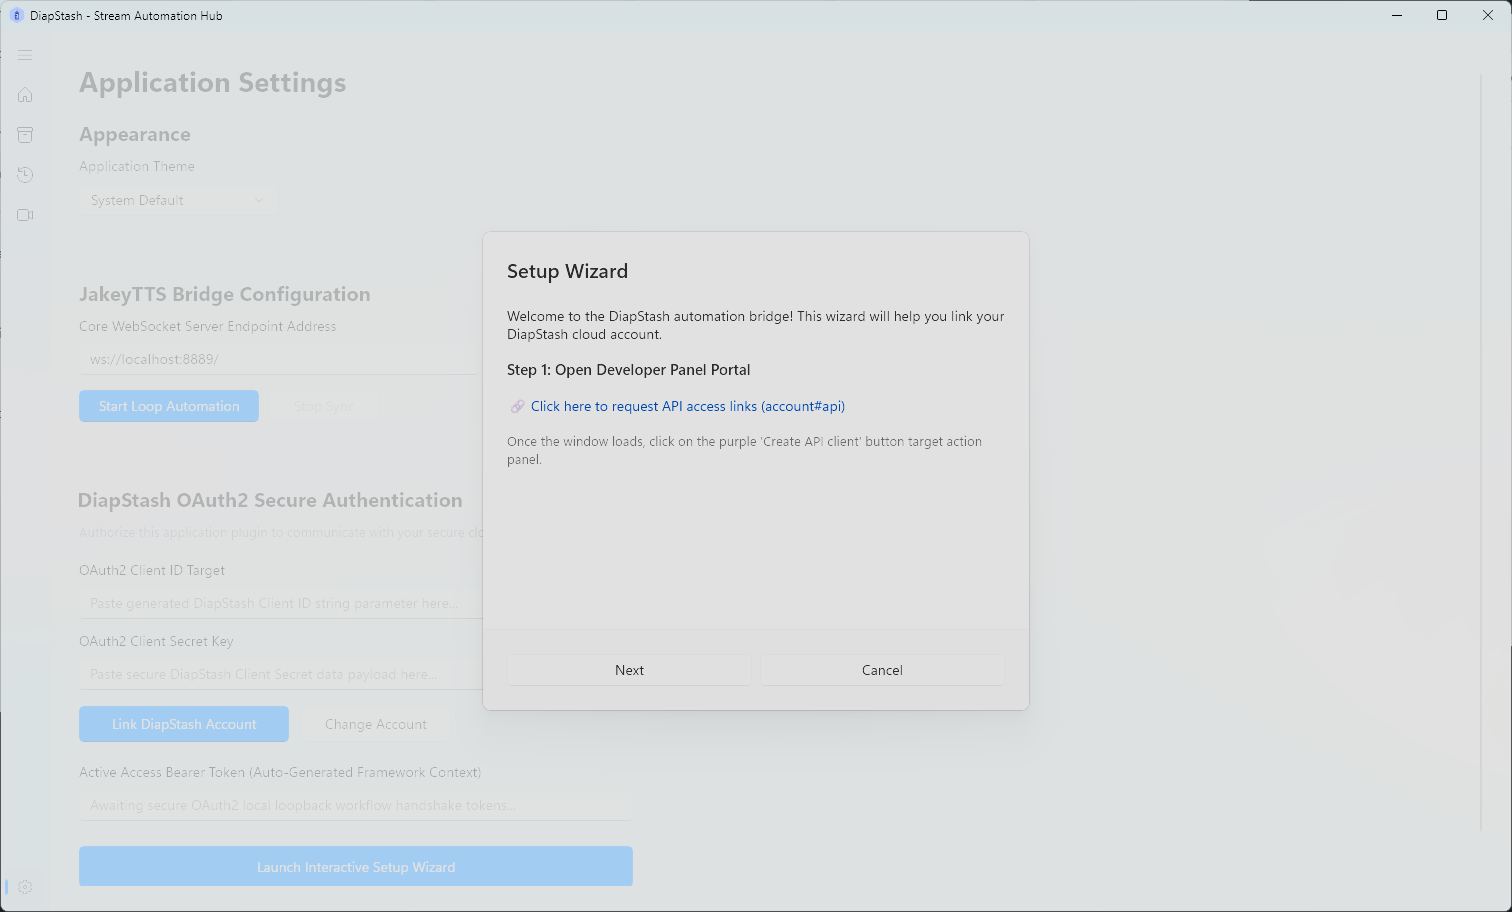 (Wizard Step 1: Link to the developer panel portal.)
Step 2: Complete the Creation Form Parameters
In the developer panel portal, fill out the application creation form with the exact parameters listed in Step 2 of the wizard:
- Client Name:
JakeyTTS Automation Bridge - Logo URL:
https://raw.githubusercontent.com/abdldavid/DiapStash-Plugin/master/Assets/LargeTile.scale-400.png - Application Type:
CRITICAL: API Server - Redirect URLs:
http://localhost:8888/
Click Next in the wizard to proceed.
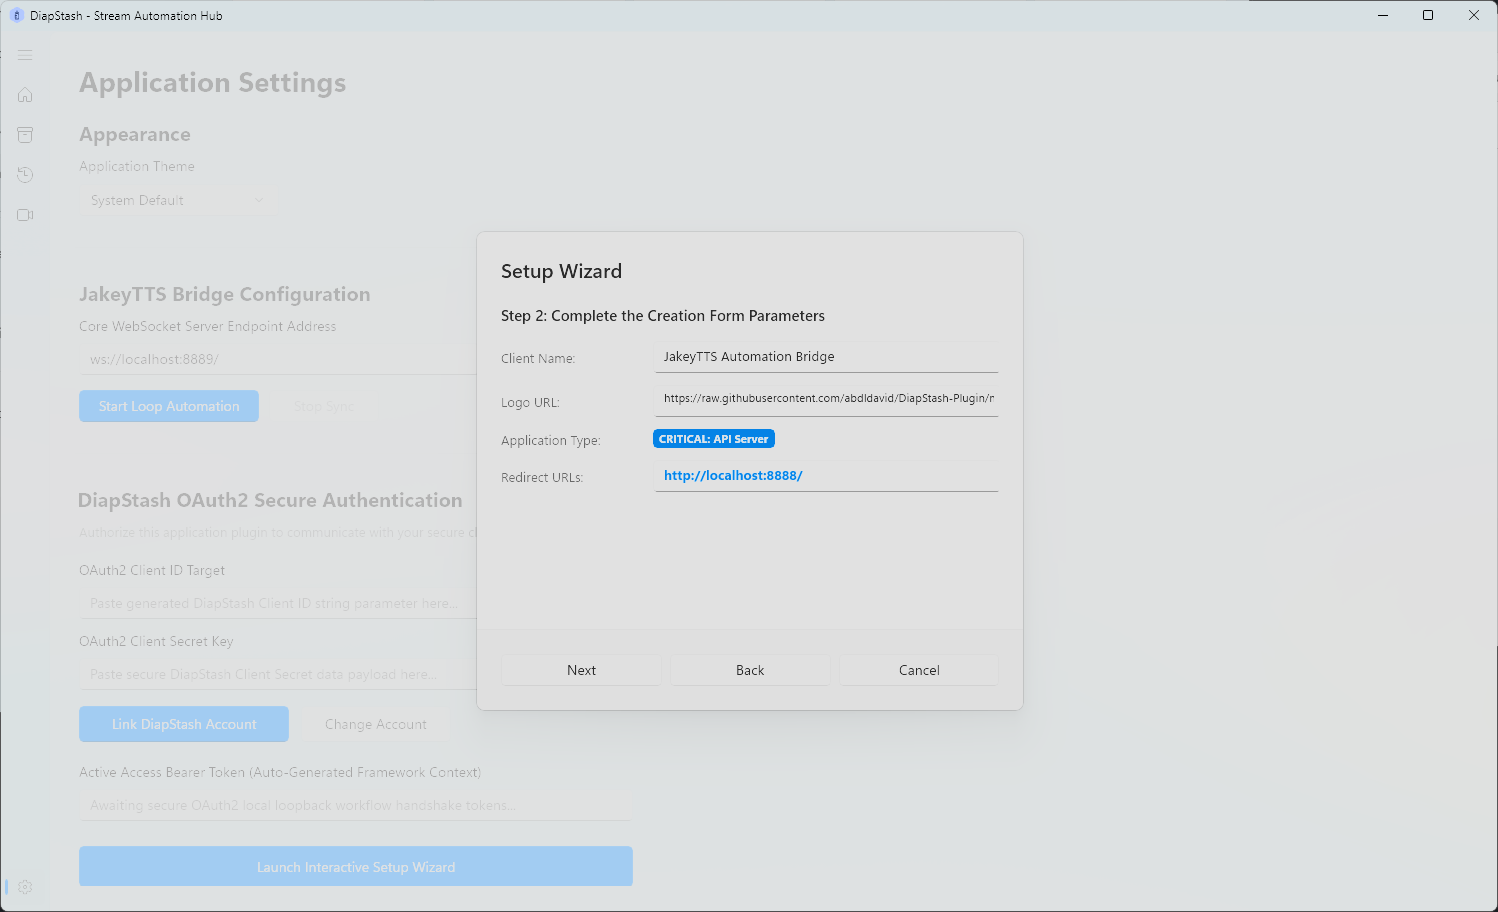 (Wizard Step 2: Form registration details including the required logo URL.)
Step 3: Select Scope Clearance Permissions
In your developer portal, select the required API scopes:
- History
- Stock
- Custom Types
[!WARNING] You must check all available scope checkboxes (History, Stock, Custom Types) on the developer portal to prevent runtime pipeline crashes.
Once scopes are selected, click Save on the portal to generate your API keys. Then click Next in the setup wizard.
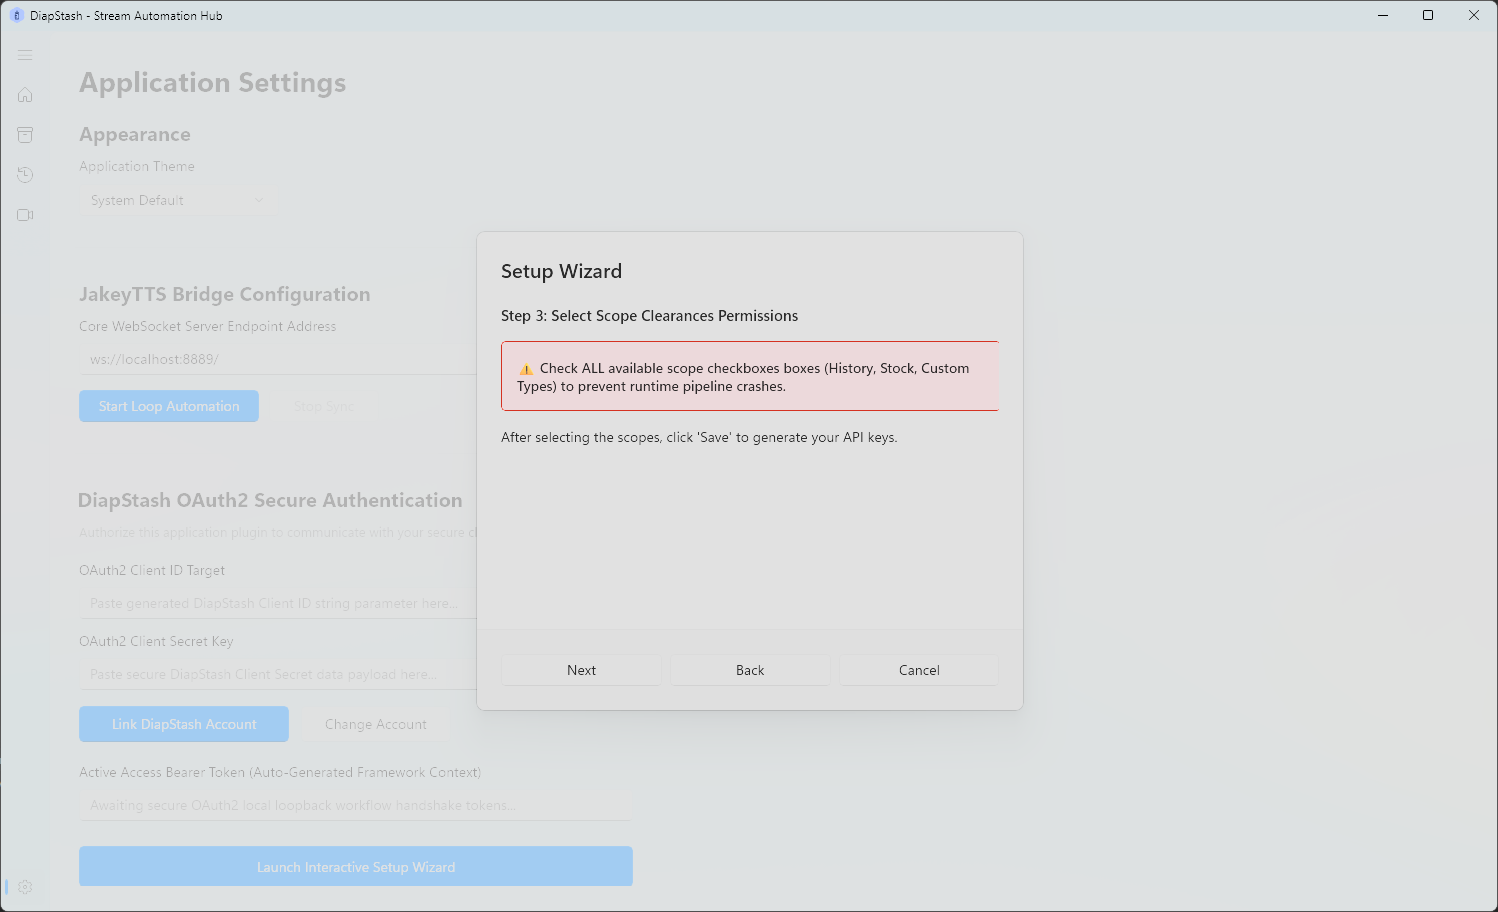 (Wizard Step 3: Scope selection checklist warning.)
Step 4: Execute Application Link Authorization
Copy the newly generated Client ID and Client Secret strings from your developer portal and paste them into their respective fields inside the setup wizard. Click Finish to save and initialize the local loopback server to authorize the application.
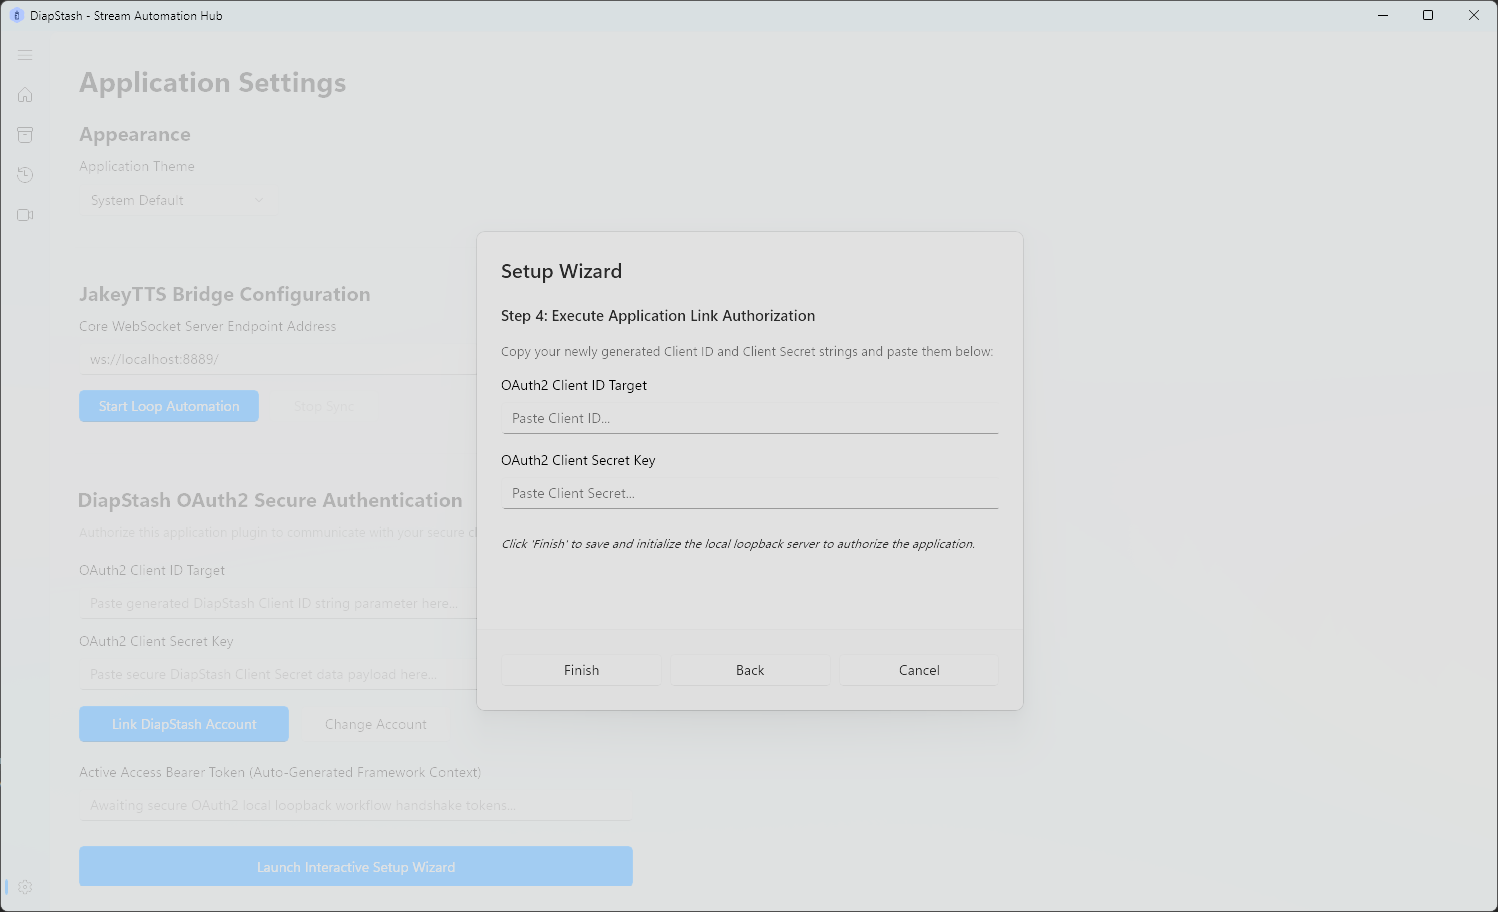 (Wizard Step 4: Pasting the generated Client ID and Client Secret keys.)
3. Web Authentication & Browser Login
As soon as you click Finish in the setup wizard, DiapStash will automatically open a browser window requesting you to authorize access to your data.
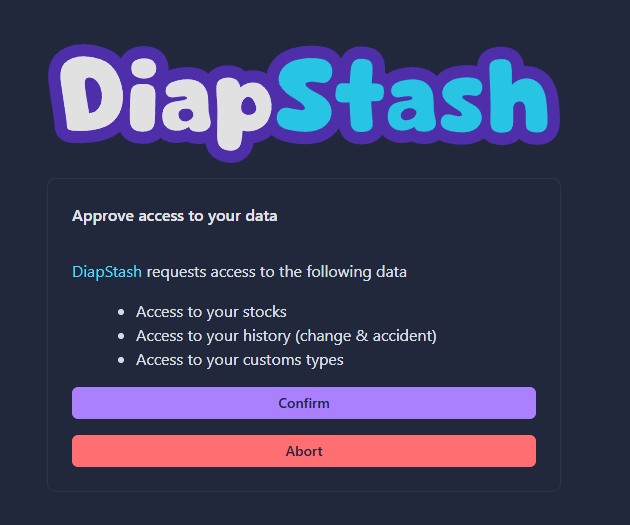 (Browser page asking to approve access to stocks, history, and custom types.)
- Review the scopes and click Confirm in your browser.
- Once authorized, the DiapStash dashboard will display a green status indicator: DiapStash Ready. Connected to Platform.
- You can now access your Inventory tab to view live catalog inventory statistics.
| Connected Dashboard | Live Inventory |
|---|---|
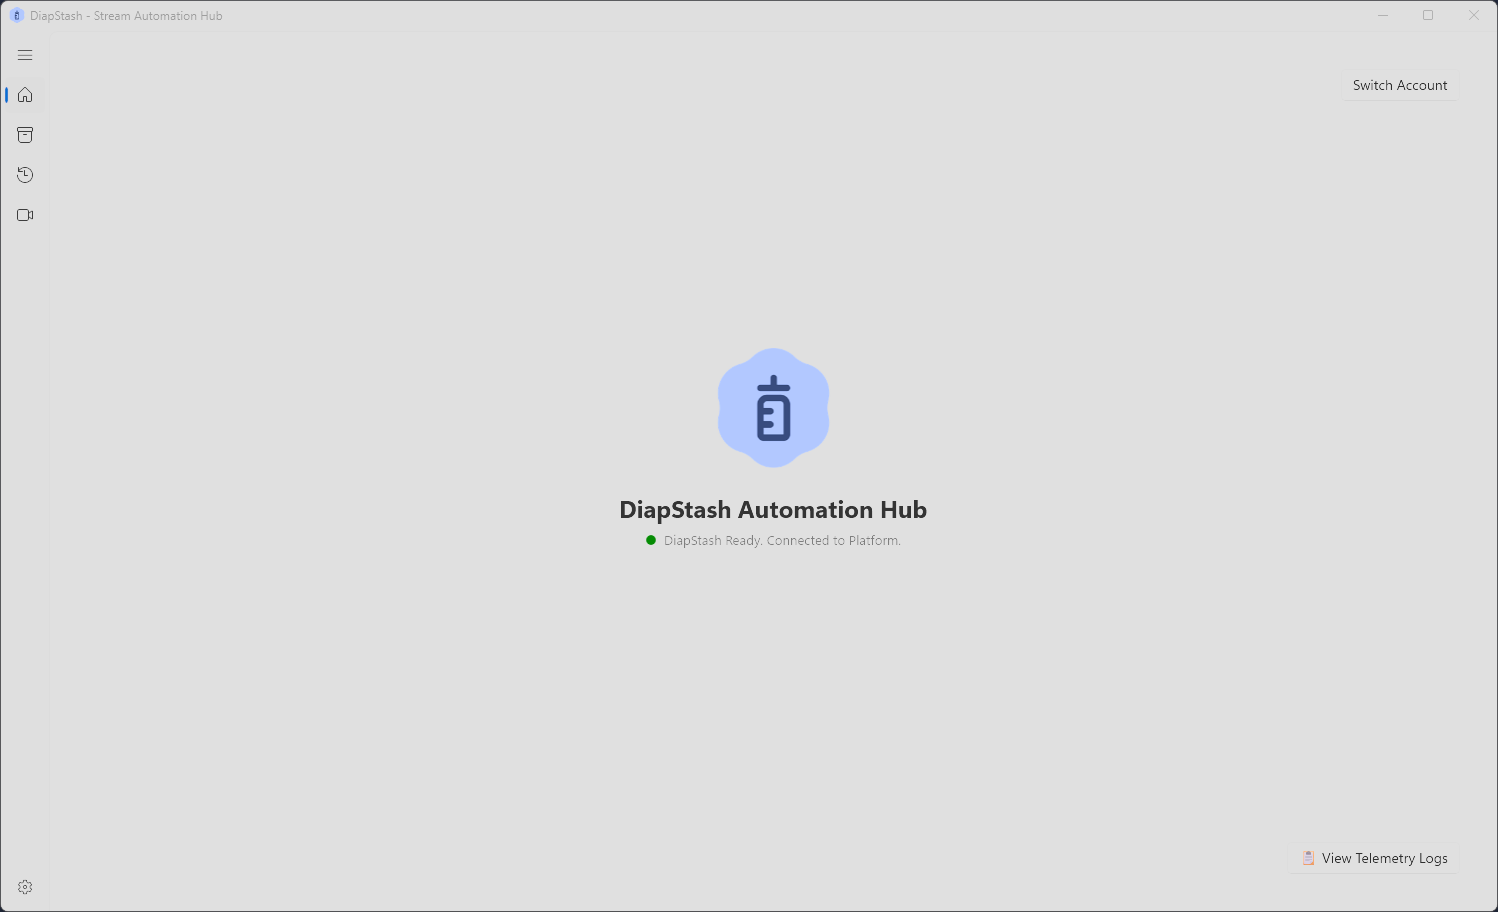 | 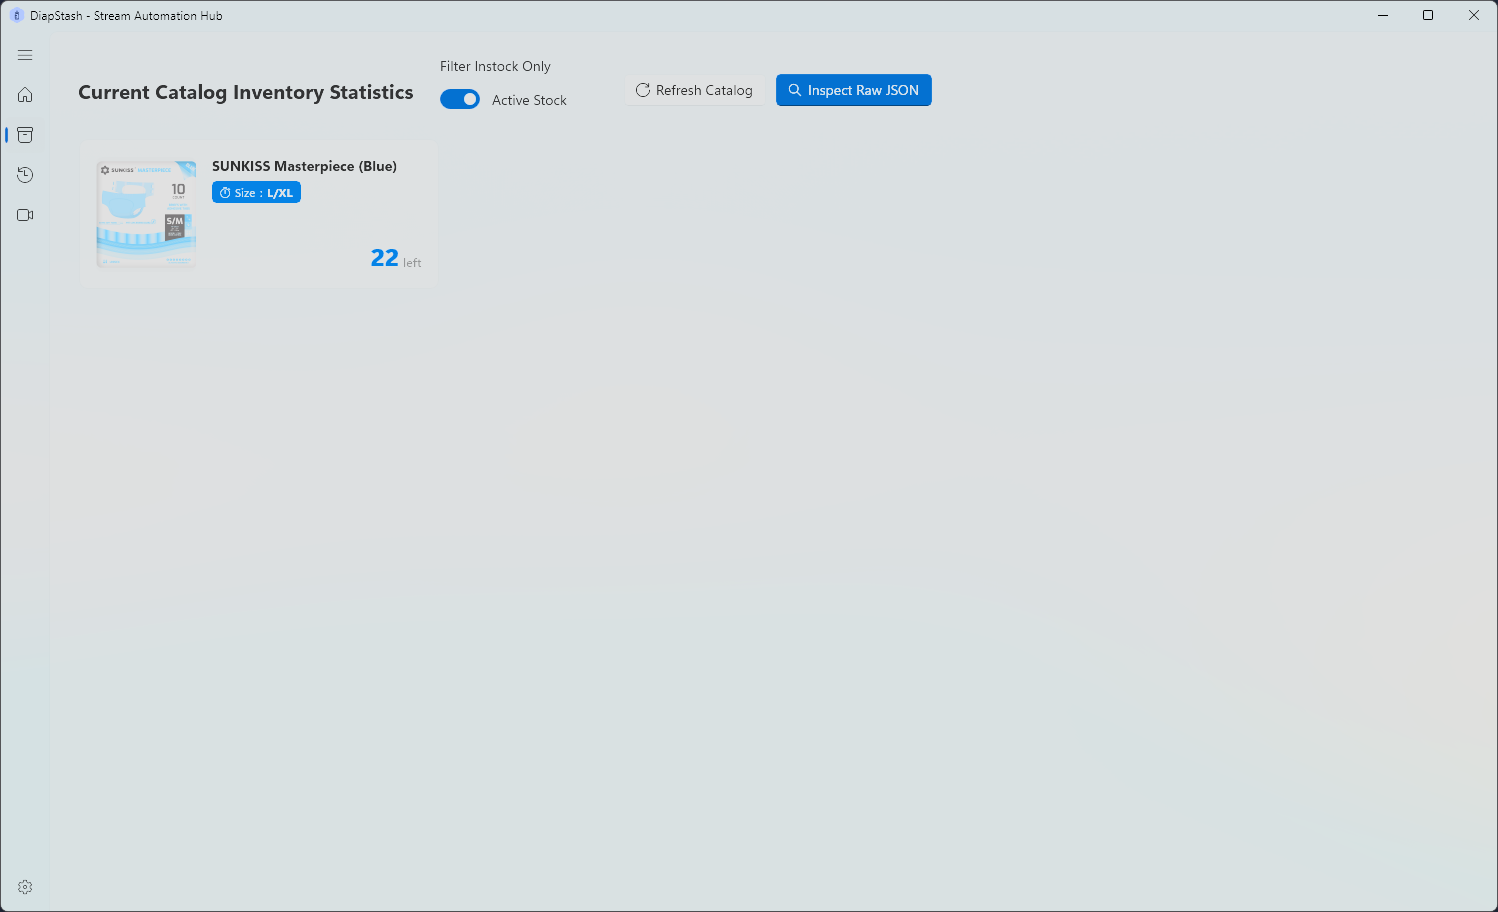 |
| Green status showing connection is active. | Catalog stats such as current active stock counts. |
4. Authorizing in JakeyTTS
With DiapStash running, it will automatically connect to your local JakeyTTS server (running on ws://localhost:8889).
To authorize the plugin inside JakeyTTS:
- Open the JakeyTTS Desktop App.
- Navigate to the Plugins & Integrations page in the left sidebar.
- You will see a card for DiapStash Integration Bridge in a pending state.
- Click the Toggle Switch next to the plugin name to authorize it (which will turn blue).
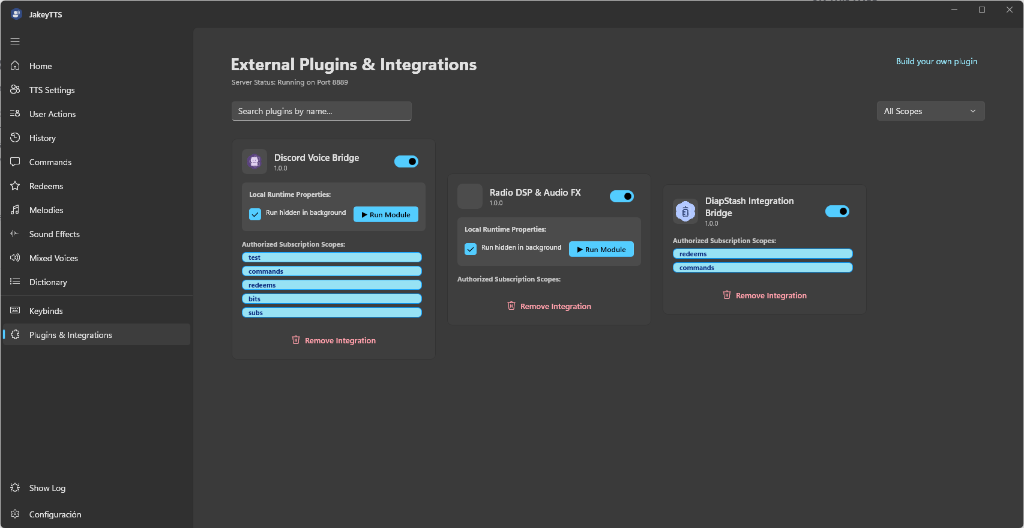 (JakeyTTS external integrations panel with the DiapStash Integration Bridge active and authorized.)
5. Dynamic Variables & Rules (Current Change Page)
On the Change Log Stream (Current Change) page in DiapStash, you can customize your response blueprints and variables.
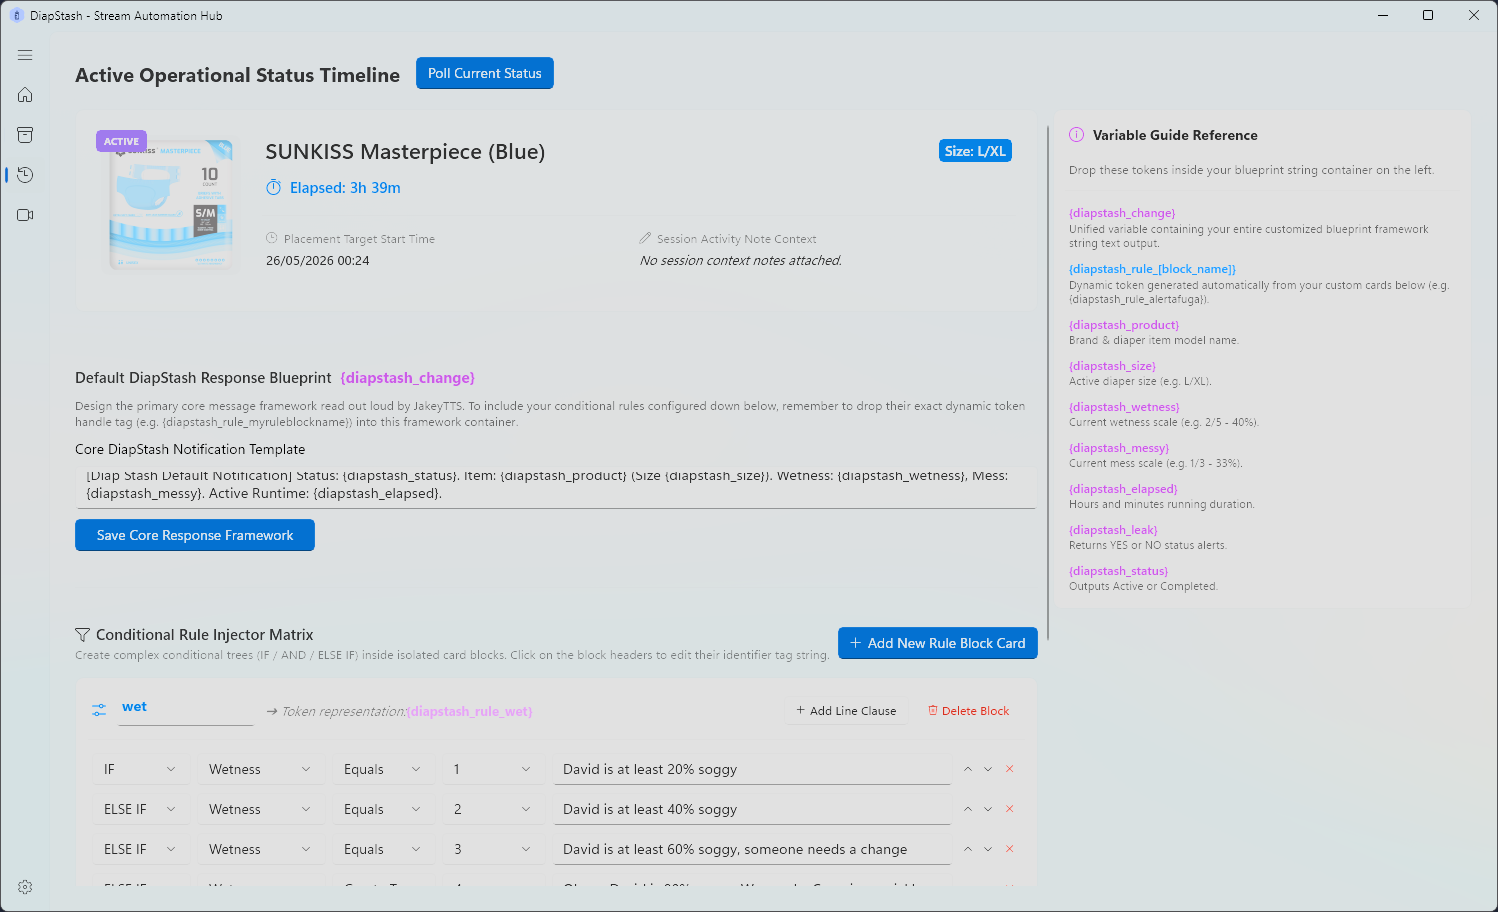 (Customizing response blueprints and checking variables.)
Core Blueprint ({diapstash_change})
You can configure a notification template containing placeholders:
[DiapStash Default Notification] Status: {diapstash_status}. Item: {diapstash_product} (Size {diapstash_size}). Wetness: {diapstash_wetness}, Mess: {diapstash_messy}. Active Runtime: {diapstash_elapsed}.
- Any of the
{}variable tokens created here can be used in your JakeyTTS commands or redeems. JakeyTTS will automatically resolve them when triggered. - Variable References:
{diapstash_product}: Brand & diaper model name.{diapstash_wetness}: Current wetness scale (e.g., 2/5 - 40%).{diapstash_messy}: Current mess scale (e.g. 1/3 - 33%).{diapstash_elapsed}: Active running duration.{diapstash_status}: Outputs Active or Completed.
Conditional Rule Injector Blocks
You can create logical block cards (e.g., wet or stinky) to inject conditional text into your blueprint based on status values:
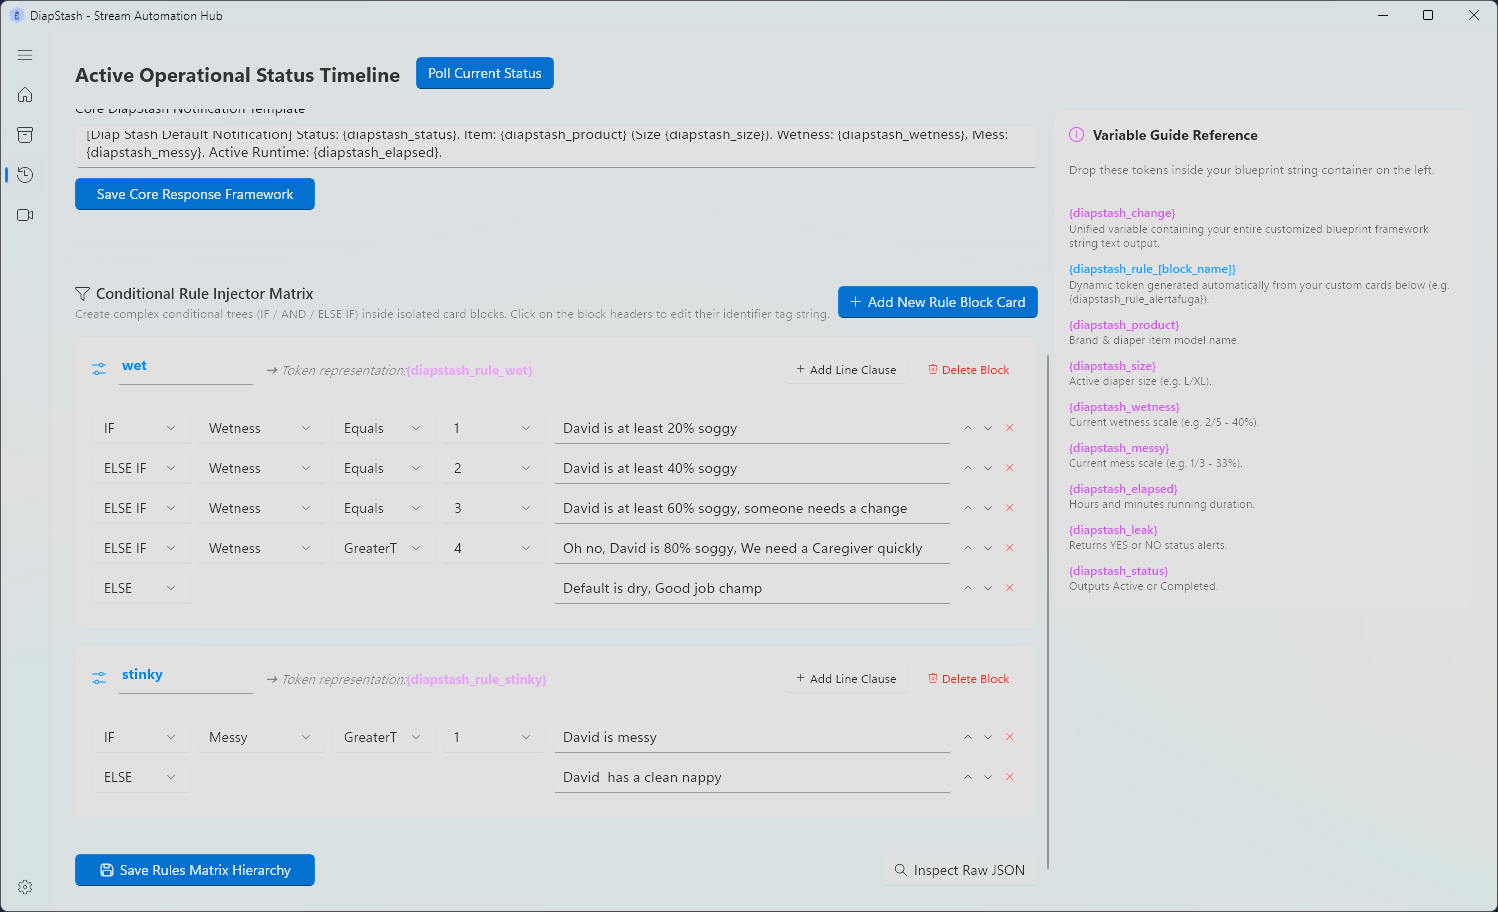 (Defining IF / ELSE IF conditional rules.)
- Rules automatically generate dynamic tokens like
{diapstash_rule_wet}or{diapstash_rule_stinky}. When inserted in the blueprint, they render the text from the matching condition!
6. Live Telemetry Studio (OBS Overlay Setup)
Navigate to the Streaming Overlay section to open the Live Telemetry Studio. This visual editor allows you to customize your stream layout overlay.
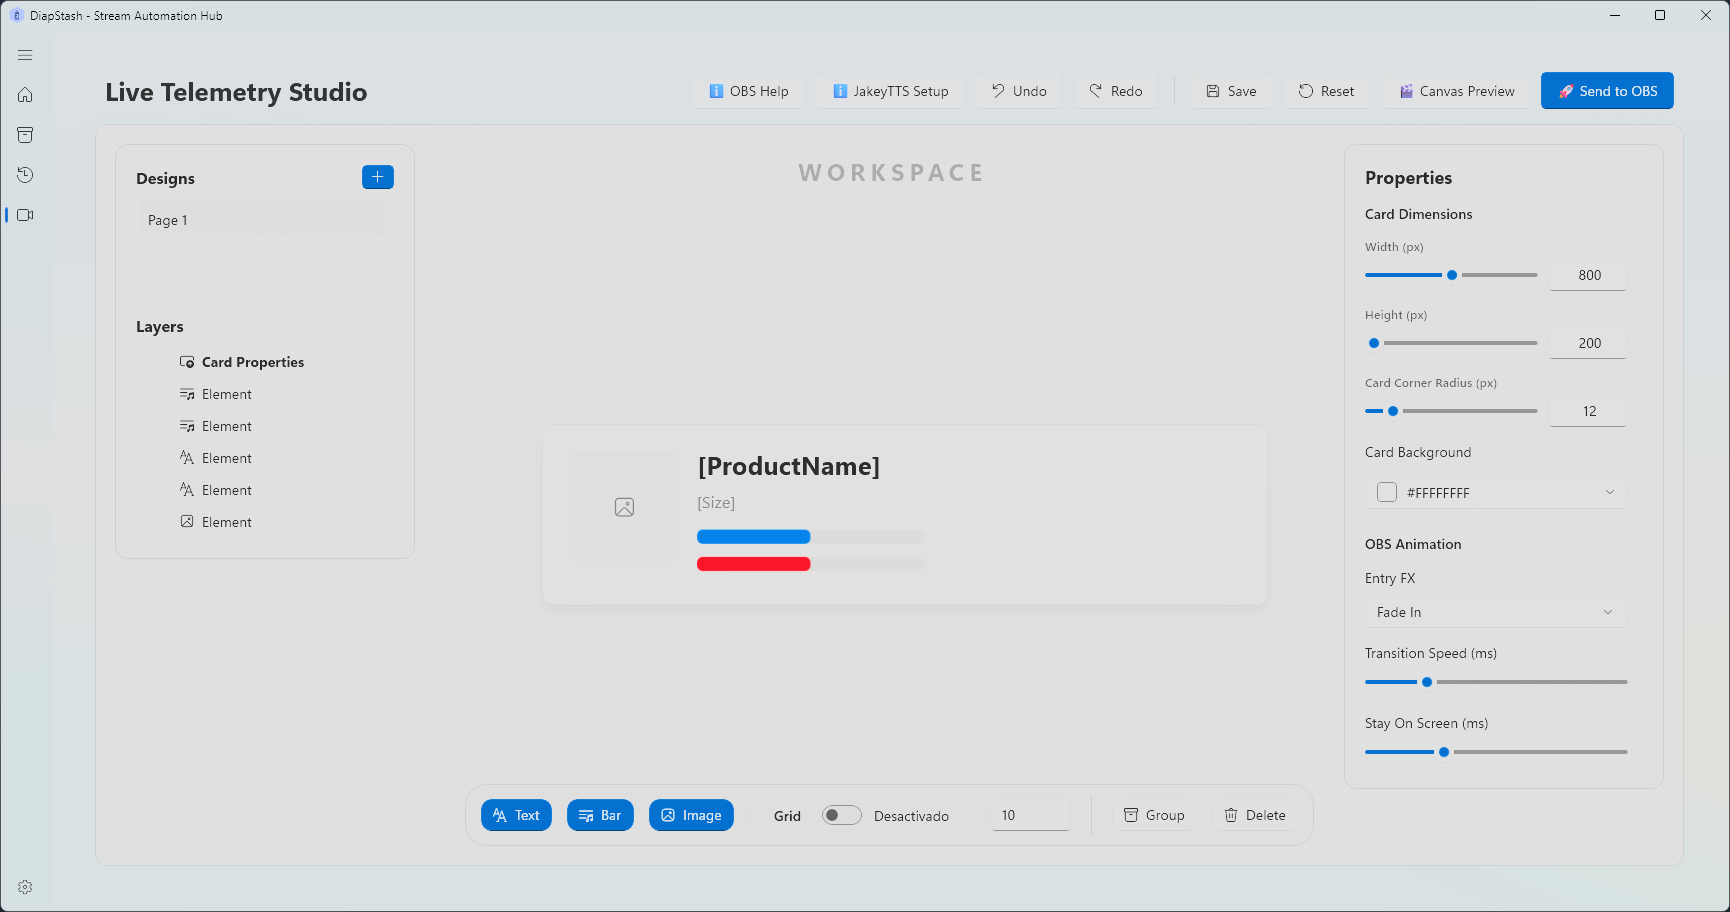 (Design workspace where you organize layers and properties for your overlay.)
- The page design selected in this streaming overlay editor is exactly what will be shown in OBS when the plugin is triggered.
Triggering the Overlay (JakeyTTS Setup)
Click on the JakeyTTS Setup button in the top bar of the overlay studio to view integration instructions:
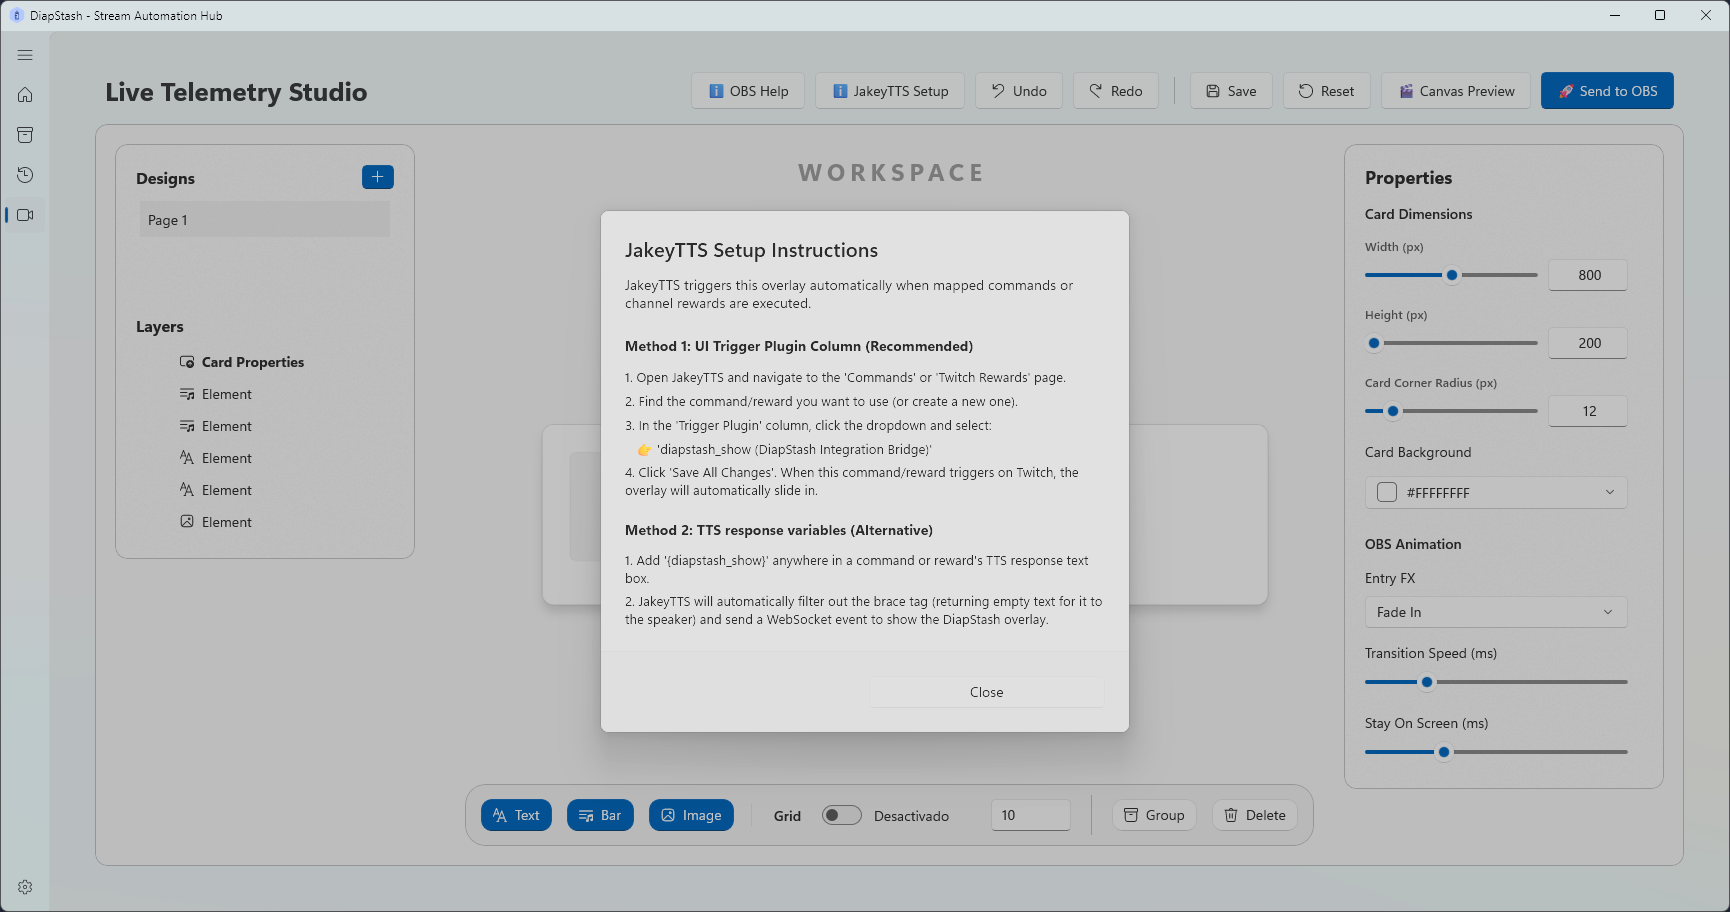 (Modal displaying instructions to link commands and Twitch rewards to the overlay.)
- Method 1 (UI Trigger Column - Recommended): Under the Commands or Twitch Rewards settings in JakeyTTS, find your desired item and set the Trigger Plugin dropdown to
diapstash_show (DiapStash Integration Bridge). - Method 2 (Alternative): Add the
{diapstash_show}variable directly into the response text block in JakeyTTS.
Displaying in OBS Studio
Click on the OBS Help button in the top bar to view layout parameters:
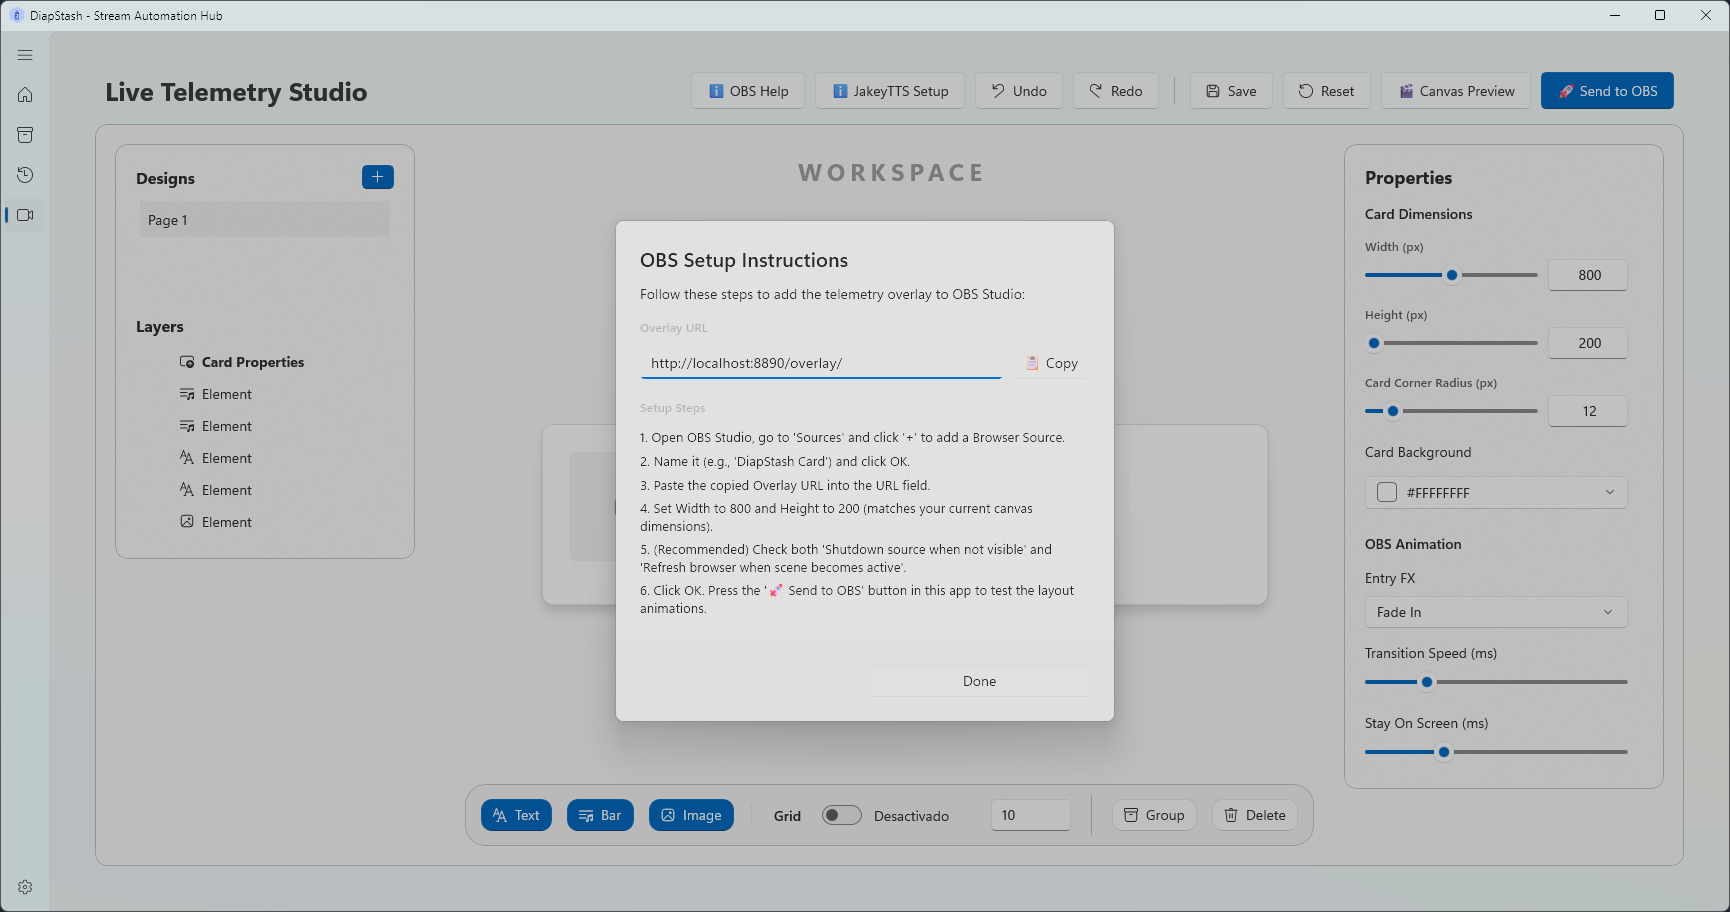 (Modal showing the overlay local address and setup steps.)
- Copy the Overlay URL (typically
http://localhost:8890/overlay/). - Add a new Browser Source in OBS Studio.
- Paste the URL, and set the Width to 800 and Height to 200 (matching your canvas dimensions).
- Click OK, and use the Send to OBS button in DiapStash to test animations and confirm everything is working!
7. Connecting Commands and Redeems
For more details on setting up chat commands, Twitch channel point redeems, variables, and advanced action blocks in JakeyTTS, make sure to read the official guides:
If you run into any issues during setup or need help configuring your triggers, hop into our Discord server or open an issue on the GitHub repo.
Happy streaming!
David