On this page
How to Configure TTS
To customize and start text-to-speech rendering in JakeyTTS, navigate to the TTS Settings tab on the left sidebar.
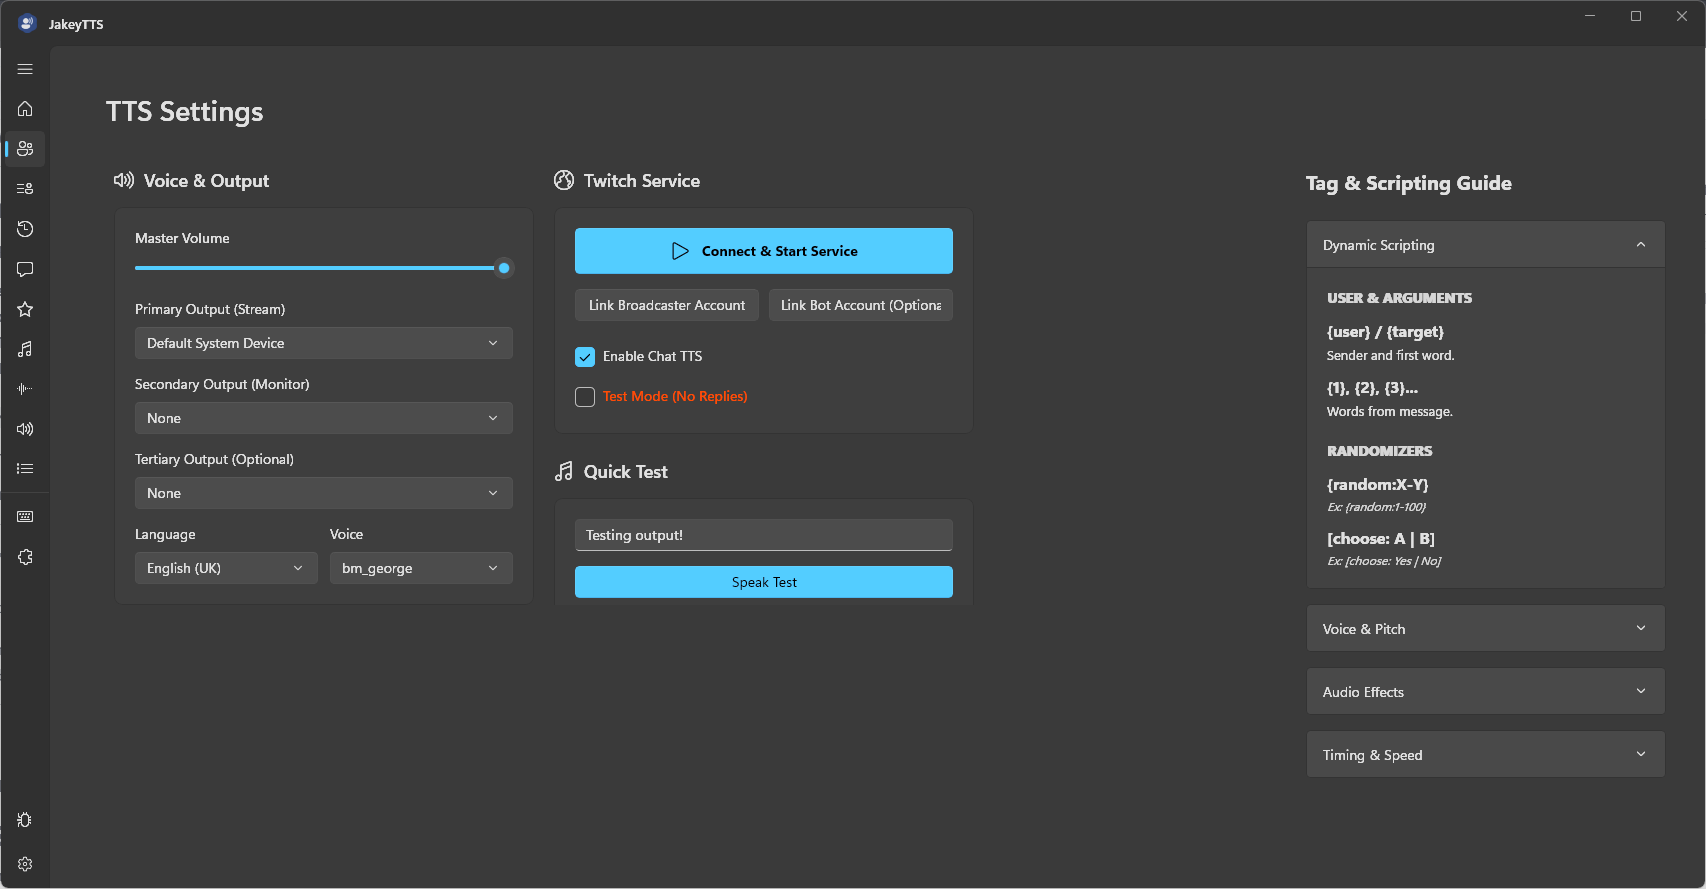 (The TTS Settings control center, configured with default outputs, linked channels, and test modes.)
1. Voice & Output Configuration
Use this section on the left to set up where the audio is played and which voice is used:
- Master Volume: A slider to set the overall volume level of all synthesized speech.
- Primary Output (Stream): Select the audio device that feeds into your streaming software (e.g., OBS, Streamlabs).
- Secondary / Tertiary Output: Route the speech audio to a second or third device (e.g., your headphones/monitor channel) so you can hear it locally without audio looping issues.
- Language & Voice: Choose the speech language (e.g., English (UK)) and the specific voice profile model (e.g., bm_george) from the dropdown.
2. Twitch Service Integration
This is the control panel to connect JakeyTTS to your Twitch channel:
- Link Broadcaster Account: Click this to authenticate the Twitch channel where you are streaming.
- Link Bot Account (Optional): If you run a secondary moderator or bot account to read or reply in chat, link it here.
- Enable Chat TTS: When checked, incoming chat messages are read automatically based on your commands/rewards configuration.
- Test Mode (No Replies): Check this to test and debug TTS features locally without sending automatic chat notifications or replies back to Twitch.
Starting the Connection
[!IMPORTANT] Once you have configured your Twitch accounts and settings, click the large blue Connect & Start Service button at the top of the Twitch Service section to activate the WebSocket and chat pipelines.
3. Quick Test
Test your settings before going live:
- Type a sample message in the input text line (e.g., Testing output!).
- Click the blue Speak Test button to render the voice output through your configured primary/secondary output devices.